
The OpenMV N6: A MicroPython Camera with a Real NPU
The OpenMV N6 pairs an 800 MHz Cortex-M55 with ST's 600-GOPS Neural-ART NPU and a removable global-shutter camera, and MicroPython - YOLO object detection at 30 fps, in Python, under a watt. We tour the hardware properly, walk through setup, and build a people-counting application on the NPU.

A MicroPython Camera with a Real NPU
- This guide: the OpenMV N6, the flagship
- The OpenMV AE3: machine vision on a battery budget
The series stands alone, though readers of the Arduino UNO Q series will find these to be two different answers to the same "camera plus AI at the edge" question.
For a decade, "machine vision on a microcontroller" has meant careful expectation management. You could track a coloured blob, find an AprilTag, run a tiny classifier at a few frames per second, and it was useful, but the serious models (the YOLOs of the world) lived on Linux boards and GPUs. The OpenMV N6 is one of the first devices that ends that era: an 800 MHz Cortex-M55 paired with ST's Neural-ART NPU delivering 600 billion INT8 operations per second, running YOLOv8 object detection at over 30 frames per second from MicroPython, at under three-quarters of a watt. That last point deserves emphasis. This is not embedded C, not a vendor SDK with a large toolchain install – this is a Python script, editable in an IDE, on a small camera module.

(tag36h11, ID 123)
Video 1. OpenMV Hand Landmarks Demos for a Single Hand at ~22 frames per second (fps)
This guide is the first of two. Here we take the flagship N6 properly: where OpenMV came from and why its approach matters, what is actually on this board (it is a denser spec sheet than most single-board computers), the setup experience, and a working application that puts the NPU to real use counting people. Part 2 gives the same treatment to the N6's sibling, the tiny OpenMV AE3, which compresses the same ideas onto a board not much bigger than a postage stamp with an impressive power budget.
csi and ml APIs shown are the new-generation interfaces; older OpenMV tutorials you find online use the legacy sensor module, which is your cue that they predate this board). Firmware moves quickly; the IDE will offer you updates, and the official documentation is the reference of record. At the time of writing the OpenMV N6 is available at a cost of USD $180 from https://openmv.io/products/openmv-n6Setting the scene: what is OpenMV?
OpenMV began in 2013 with a straightforward view that machine vision should be as approachable as Arduino made microcontrollers. The formula has not changed since: a camera and a capable MCU on one small board, a MicroPython firmware in which the camera is a Python object, and an IDE that shows you the live frame buffer while your script runs on the device. That last element is very clever. Vision development is challenging when you cannot see what the camera sees; OpenMV's IDE streams the annotated frames back over USB as your loop runs, so debugging a detector feels like using a REPL (a read-eval-print loop: the interactive prompt, familiar from Python, where you type a line and see its result immediately) rather than the slow write-compile-flash-observe cycle of traditional firmware.
A decade of boards (M4, M7, H7, the RT1062) refined the formula on ever-faster general-purpose MCUs. The new generation (this N6 and Part 2's AE3) is different in kind, not just degree, because the silicon now carries dedicated neural accelerators. The MCU still runs your Python; the NPU runs your network. OpenMV's job, done well here, was to make that split invisible: the model is an object, predict() is a method, and the fact that a 600-GOPS accelerator did the work is a line in a datasheet rather than a thing you have to program yourself.
It is worth placing this against my UNO Q series, because the two products answer the same question with opposite architectures. The UNO Q creators said: put Linux next to the microcontroller, run the AI on the A53s in containers, and orchestrate the pair. The N6 creators say: no Linux anywhere, one chip, the AI in dedicated silicon, everything in one MicroPython script. The UNO Q approach gets you Debian's infinite software; the OpenMV approach gests you a 21-gram, sub-watt, instant-boot device with no operating system to maintain, that you can bolt to a drone arm or run from a battery for days.
Neither wins in all applications, but by the end of this post the trade-off should be clear.
The hardware in Detail
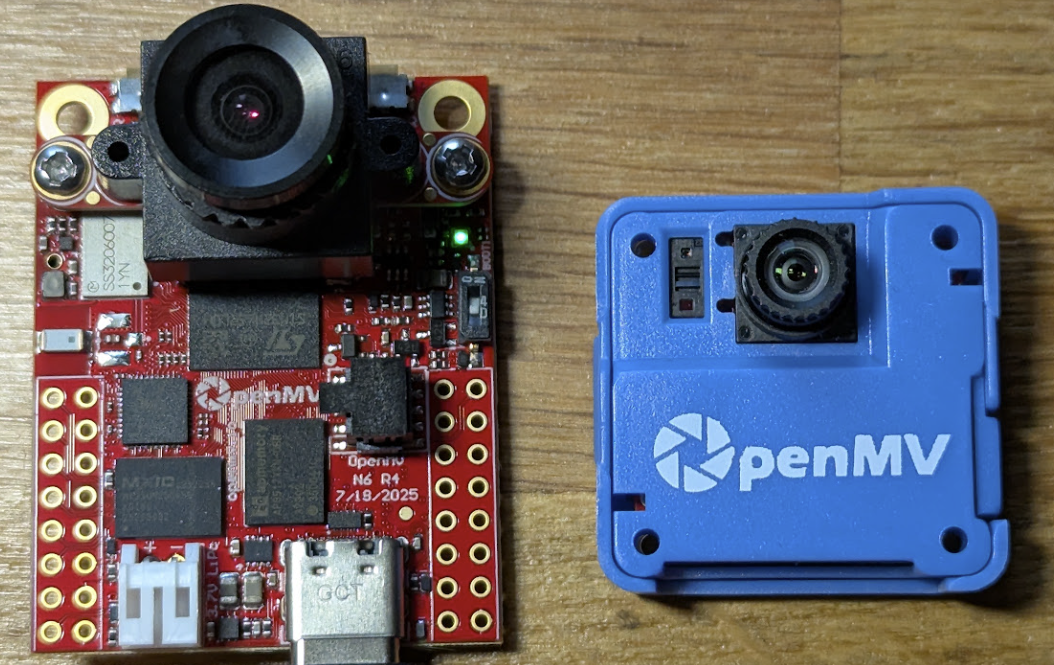
The N6 is dense enough that the specification table requires some commentary afterwards (from https://openmv.io/products/openmv-n6):
Four rows require expansion, the SoC, NPU, Camera and I/O:
- The STM32N657 SoC has no flash of its own. This is the detail of the whole board. ST built the N6 series flashless: the chip boots from external memory, and the N6 board surrounds it with 32 MB of octal-SPI flash and 64 MB of DDR SDRAM on wide, fast buses. That is why this "microcontroller" board has memory numbers resembling a 2005 PC: neural networks are big, frame buffers are big, and ST chose external-memory bandwidth over on-die flash. For readers of my Zephyr series, who spent posts nursing 1 MB parts through dual-slot OTA layouts: 32 MB changes which problems exist.
Embedded Memories
Contiguous RAM
External memory
interfaces
(PSRAM, SDRAM, NOR,
NAND, TFT-LCD)
Graphics
Display controller
Multimedia
800 MHz
TrustZone®
MVE
accelerator 600 Gops
System
Security
Camera pipeline
Camera I/F Parallel
16-bit with PSSI
Connectivity
HS + HS PHY
Audio
Analogue
sensor
Timers/Control
PWM synchronised
AC timers
Figure 2. The STM32N657 SoC details, with the ST Neural-ART accelerator at 600 Gops (giga/billions of operations per second) at the centre. Because it is an MCU designed for the edge, this performance is highly optimised for power consumption, operating at an efficiency of up to 3 TOPS/W (Tera Operations Per Second per Watt).
800 MHz + Helium SIMD
1 GHz · 600 GOPS INT8
──➔
32 MB · 400 MB/s
boot code + read-only /rom models
──➔
──➔
64 MB · 16-bit @ 200 MHz · 800 MB/s
frame buffers + network activations
Figure 3. The flashless architecture. The SoC boots from external octal-SPI flash and memory-maps its /rom models straight out of it (no copy to RAM), while the NPU and CPU share on-chip SRAM and lean on the wide, fast DDR bus for frame buffers and activations. The two external memories on their own buses are what give a "microcontroller" 96 MB to work with.- The NPU is the reason this board exists. Neural-ART is ST's in-house neural accelerator: a grid of multiply-accumulate engines with its own data paths into that external memory, running quantised (INT8) networks. The 600-GOPS figure is best understood through what it delivers: YOLOv8-nano, a real single-stage detector, at 30+ FPS. The Cortex-M55 alone, Helium and all, manages low single digits on the same network. The NPU is not an incremental speedup; it is the difference between "detector as the frame loop" and "detector as an occasional event".
/rom is already INT8. The point worth carrying away is why the NPU insists on it.- The camera is global shutter, and removable. Most cheap cameras (and most every phone) use rolling shutter: rows are exposed sequentially, so anything moving during readout skews and wobbles. The PAG7936 Camera Module exposes every pixel simultaneously, so a propeller doesn't look like a curved boomerang. Machine vision people pay real money for this property, and it pairs beautifully with the sensor's surprising frame rates (480 FPS(!) at 320×200 is high-speed-camera territory). The sensor also sits on a small removable carrier with MIPI-CSI and parallel interfaces exposed: other sensor modules (different optics, different sensors as OpenMV releases them) swap onto the same board, which future-proofs the platform in a way soldered sensors cannot.
- The I/O row is very strong. Two CAN FD buses, gigabit Ethernet with PoE, servo headers, an IMU, and LiPo charging: this is a board specified to be installed: on a robot arm (CAN), a factory line (PoE Ethernet), a drone (IMU + servos + battery). OpenMV's maker-friendly surface hides an industrial parts list.
Setup: five minutes
The OpenMV experience remains one of the best onboarding in embedded vision, and on the N6 it goes like this:
- Install OpenMV IDE (Windows, macOS, Linux).
- Connect the N6 over USB-C. The IDE detects it, and if the firmware is out of date, offers a one-click update (the
mlAPIs are young and firmware releases matter). - Click Connect, and the bundled hello-world script appears. Click Run, and the frame buffer pane comes alive with what the camera sees.
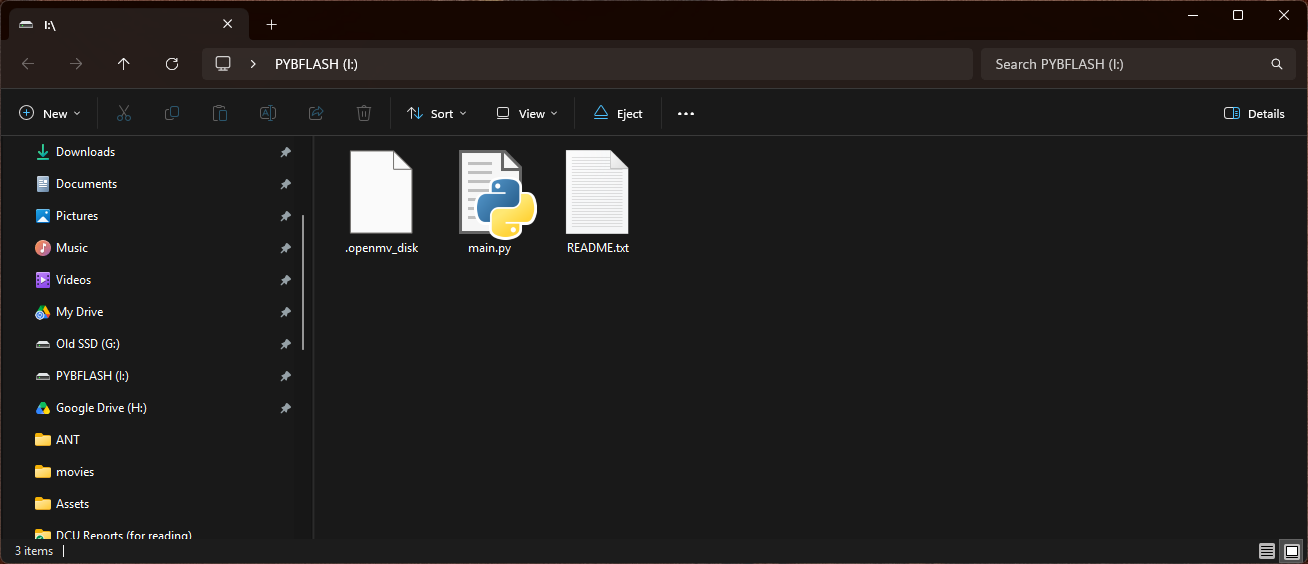
That is the entire toolchain story. Two habits worth forming immediately: scripts run from the IDE live in RAM (stop them and they are gone), while saving as main.py to the device makes them run standalone at power-on, which is how the people counter below becomes an appliance. And the serial terminal at the bottom of the IDE is your print() output, live, alongside the video.
The camera-as-object model is quickly stated. The new-generation firmware exposes the sensor through the csi module:
import csi                          # camera / sensor interface (new-gen API)

# --- Camera setup: configure the sensor once, before the loop. --------
csi0 = csi.CSI()                    # get a handle to the camera
csi0.reset()                        # bring it to a known, initialised state
csi0.pixformat(csi.RGB565)          # 16-bit colour frames
csi0.framesize(csi.VGA)             # capture at 640x480 (predict() rescales)

img = csi0.snapshot()           # grab one frame as an image object
Everything OpenMV can do (blob tracking, tag detection, drawing, and the ML below) is a method on that img or a module operating on it, one frame at a time, in a while True: loop you write yourself. There is no hidden pipeline; the loop is the application.
csi the same as the physical CSI bus? Not quite. "CSI" the acronym is the MIPI Camera Serial Interface (CSI-2), a hardware bus, and on the N6 the camera really does connect over it (a 4-lane MIPI CSI-2 link). But the csi module here is a software abstraction: the object-oriented successor to OpenMV's old sensor module, representing "the camera" whatever its physical wiring. The same csi.CSI() API drives sensors that are not on a MIPI-CSI bus at all (the SPI thermal Lepton, the event-based GENX320). So on this board the name and the hardware happen to line up, but csi.CSI() is your handle to the camera, not specifically to the MIPI peripheral..tflite file; recently renamed LiteRT) is the other end of that pipeline: a compact, frozen, usually quantised version of a trained model, plus a small runtime designed to run it on phones and microcontrollers. So training happens in TensorFlow on a big machine; the .tflite file is what you deploy to the edge. On the N6, ml.Model loads a .tflite and the NPU executes its operators, which is why OpenMV files the machine-learning examples under a TensorFlow submenu. One nuance worth knowing: .tflite has become a standard form that many tools export to (Edge Impulse, Ultralytics, ST's converter), so you rarely touch TensorFlow itself, but you just end up with its file format.The NPU from MicroPython: the ml module
Neural inference on the N6 is packaged as: models are files, loading is one line, and post-processing is a pluggable object. The pieces:
- Models live on a read-only
/romfilesystem in that generous external flash, alongside anything you add on the µSD card. ROM-filesystem models are memory-mapped rather than copied, so a multi-megabyte network costs no RAM to load. The firmware ships with a small zoo (import os; print(os.listdir('/rom'))to see yours – see below), including the YOLOv8-nano detector used below. That one is the fileyolov8n_192.tflite: the_192is the model's input resolution (192×192 pixels), so a name likeyolov8n_192reads as "YOLOv8-nano, 192-pixel input".predictscales each camera frame down to that size before inference, which is part of why a nano model runs so fast.
ml.Model(path, postprocess=...)loads a quantised TFLite model and routes its operators to the NPU. Thepostprocessargument is the clever design decision: raw detector output (anchor grids, logits) differs per model family, so theml.postprocessingmodule provides decoders for the common ones: YOLOv5/v8, MediaPipe's BlazeFace and friends, Edge Impulse FOMO. Your loop receives boxes and scores, not tensors.- Custom models follow the same path: train (or export) a quantised TFLite network, run it through ST's Edge AI conversion for Neural-ART, drop it on the SD card, and point
ml.Modelat it. Edge Impulse supports the board directly, which mirrors the custom-model story from my UNO Q article Part 2, albeit one abstraction lower.
On the N6 (firmware v5.0.0) that /rom zoo listed like this. A small program (model_list.py) with the code:
# Untitled - By: Derek Molloy - Fri Jul 24 2026

import os

print(os.listdir('/rom'))
Gives the output:
['fomo_face_detection.tflite', 'fomo_face_detection.txt', 'force_int_quant.tflite',
 'person_detect.tflite', 'person_detect.txt', 'yolo_lc_192.tflite', 'yolo_lc_192.txt',
 'yolov8n_192.tflite', 'yolov8n_192.txt', 'blazeface_front_128.tflite',
 'face_landmarks_192.tflite', 'palm_detection_full_192.tflite',
 'hand_landmarks_full_224.tflite', 'movenet_singlepose_192.tflite',
 'haarcascade_eye.cascade', 'haarcascade_smile.cascade',
 'haarcascade_frontalface.cascade']
That single directory is a tour of edge vision. There are object detectors and tiny classifiers (yolov8n_192 and yolo_lc_192 for people, plus the compact fomo_face_detection (Edge Impulse's FOMO architecture) and a person_detect model); MediaPipe pipelines for faces and hands (blazeface_front_128 finds faces, face_landmarks_192 maps 3D face mesh points, palm_detection_full_192 plus hand_landmarks_full_224 give the hand-tracking demo shown earlier); a pose estimator (movenet_singlepose_192, the seventeen-keypoint skeleton); and, tellingly, three Haar cascades (haarcascade_*) (the pre-neural face/eye/smile detectors from the 2000s, still bundled because they are near-free to run and sometimes the right tool). A .tflite model usually has a matching .txt of class labels beside it (which is exactly the sidecar file ml.Model reads into model.labels). One command, and you can see the platform's whole vocabulary.
Here is OpenMV's canonical detector example (yolo_v8_detector.py), the seed of our application. The executable lines are exactly OpenMV's; I have added comments walking through each step:
# This work is licensed under the MIT license.
# Copyright (c) 2013-2025 OpenMV LLC. All rights reserved.
# https://github.com/openmv/openmv/blob/master/LICENSE
#
# YOLOv8 detector (OpenMV's shipped example, annotated here with extra
# comments). It runs a YOLOv8 object-detection model on the Neural-ART
# NPU; an NPU-class OpenMV Cam (the N6 or AE3) is needed to hit
# real-time frame rates -- the CPU alone manages only a few FPS.

import csi                          # camera / sensor interface (new-gen API)
import time                         # used only for the FPS clock
import ml                           # model loading + NPU inference
from ml.postprocessing.ultralytics import YoloV8   # decoder for YOLOv8 output

# --- Camera setup: configure the sensor once, before the loop. --------
csi0 = csi.CSI()                    # get a handle to the camera
csi0.reset()                        # bring it to a known, initialised state
csi0.pixformat(csi.RGB565)          # 16-bit colour frames
csi0.framesize(csi.VGA)             # capture at 640x480 (predict() rescales)

# --- Model: load once (loading per-frame would kill the frame rate). --
# The .tflite is memory-mapped from the read-only /rom, so it costs no
# RAM. postprocess=YoloV8(...) attaches the decoder that turns raw output
# tensors into boxes; threshold=0.4 discards detections below 40% score.
model = ml.Model("/rom/yolov8n_192.tflite", postprocess=YoloV8(threshold=0.4))
print(model)                        # prints the model's input/output shapes

# --- Visualisation: give each class label its own colour. -------------
n = len(model.labels)               # how many classes this model knows
# Spread values across the class list so each label draws distinctly.
model_class_colors = [(int(255 * i // n), int(255 * (n - i - 1) // n), 255) for i in range(n)]

clock = time.clock()                # FPS timer
while True:                         # the frame loop IS the application
    clock.tick()                    # mark the start of this frame
    img = csi0.snapshot()           # grab one frame as an image object

    # predict() scales img to the model's 192x192 input, runs the NPU,
    # and returns results grouped BY CLASS: a list with one entry per
    # class, each a list of ((x, y, w, h), score) tuples in img pixels.
    boxes = model.predict([img])

    # Walk each class and draw that class's detections onto the frame.
    for i, class_detections in enumerate(boxes):
        rects = [r for r, score in class_detections]                 # boxes for class i
        labels = [model.labels[i] for j in range(len(rects))]        # the class name, repeated
        colors = [model_class_colors[i] for j in range(len(rects))]  # its colour, repeated
        ml.utils.draw_predictions(img, rects, labels, colors, format=None)

    # fps() is the WHOLE-pipeline rate: capture + inference + drawing,
    # not an inference-only number.
    print(clock.fps(), "fps")
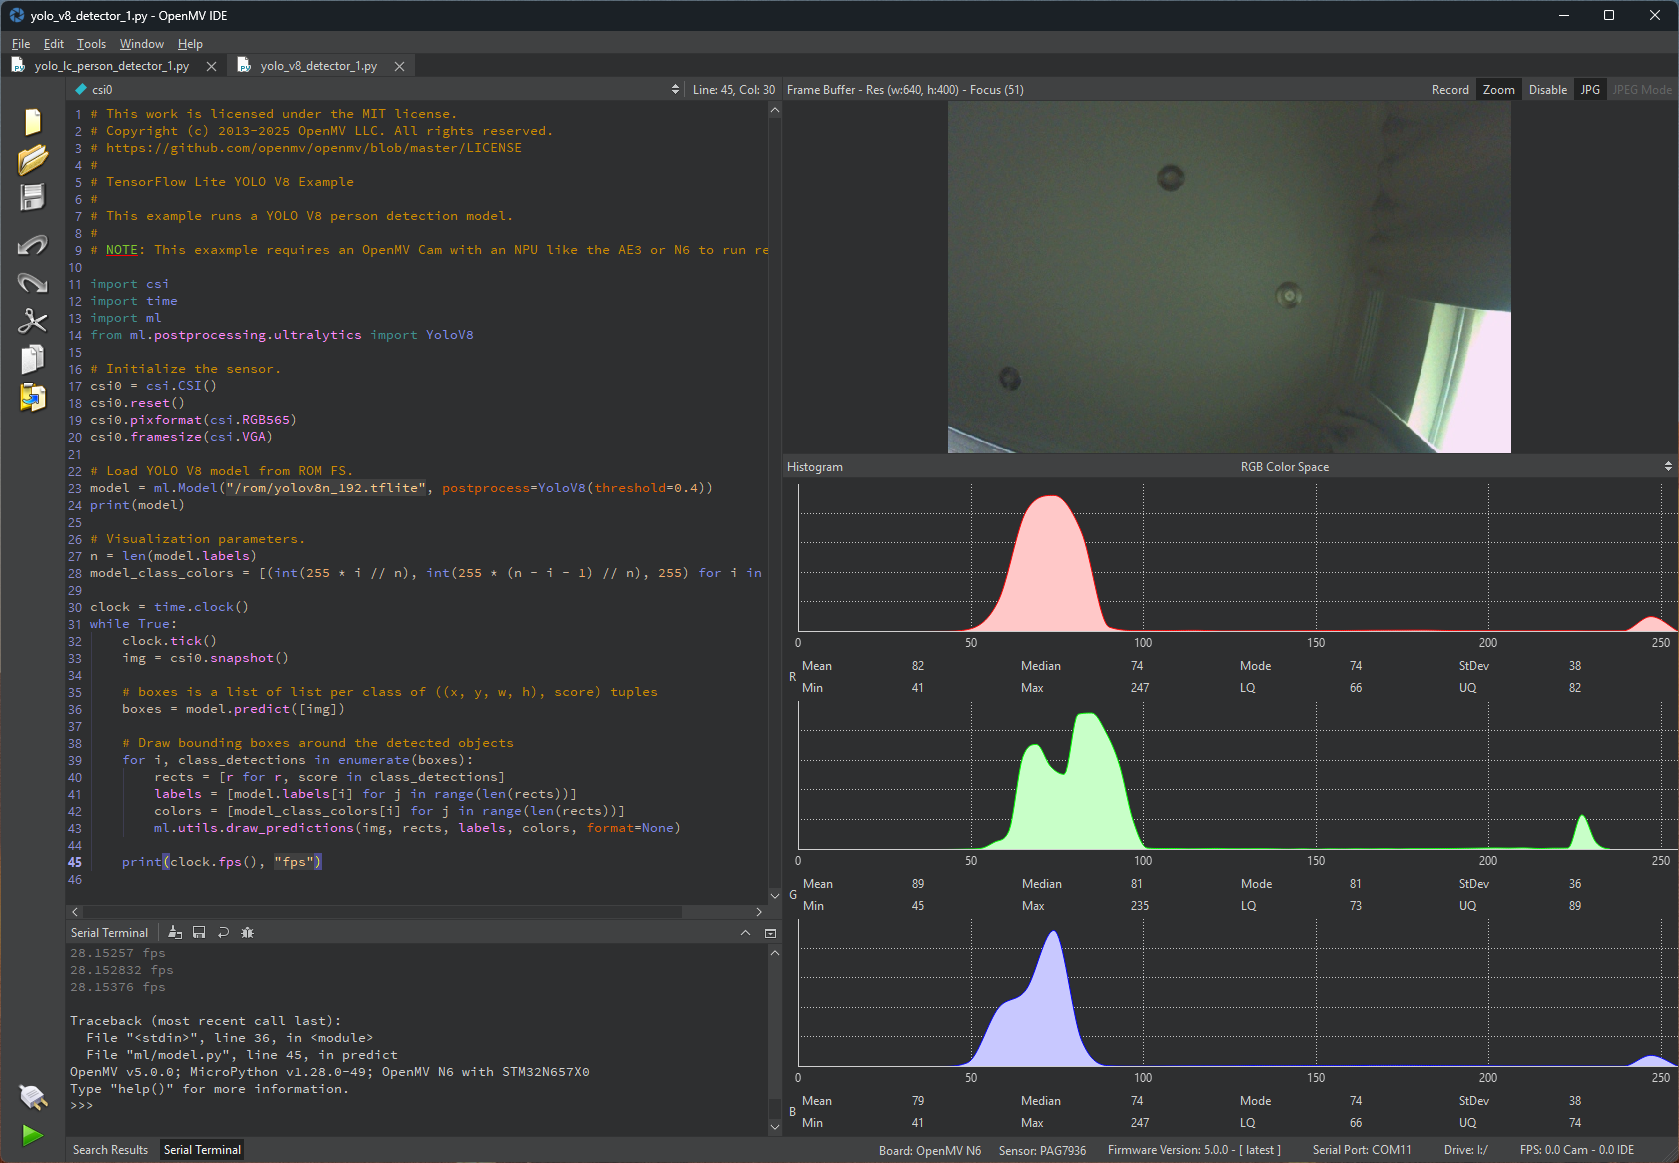
Run it, and watch the IDE's frame buffer draw a box around you at about 27 frames per second. Take a moment with the shape of that script: a real YOLO, and the entire program fits on an A4 page. The predict([img]) call scales the frame to the model's input, hands it to the NPU, and decodes the output through the YoloV8 object; the printed FPS is the whole pipeline including image capture and drawing graphics – not an inference-only number.
The OpenMV IDE streaming the annotated frame buffer live: YOLOv8 boxes drawn over the camera feed as the script runs, with FPS printing to the serial terminal. The live frame buffer on the right with YOLOv8 bounding boxes drawn over the video, the script on the left, and the FPS print() lines scrolling in the serial terminal below.
Video 2. A live view of the standard olo_v8_detector.py application running on the OpenMV N6.
That script has three siblings in the same 03-Machine-Learning/00-TensorFlow/ folder, one per YOLO generation. They are worth knowing about, because moving between them is almost entirely a matter of which decoder you import and which model you load:
| Example | Detector (decoder) | Model in /rom? |
Real-time without NPU? |
|---|---|---|---|
yolo_lc_person_detector.py |
YOLO-LC, a trimmed YOLOv2 (darknet.YoloLC) |
Yes -- yolo_lc_192.tflite (person only) |
Yes |
yolo_v2_detector.py |
Tiny-YOLOv2 (darknet.YoloV2) |
No -- you supply one | No |
yolo_v5_detector.py |
YOLOv5 (ultralytics.YoloV5) |
No -- you supply one | No |
yolo_v8_detector.py |
YOLOv8 (ultralytics.YoloV8) |
Yes -- yolov8n_192.tflite (person only) |
No |
Two things fall out of that table. First, the pluggable postprocessor is what makes the swap trivial: change the from ml.postprocessing... import ... line and the ml.Model path, and the rest of your loop is identical whichever YOLO you run, because each decoder hides its family's particular output format behind the same "list of boxes per class" result. Second, YOLO-LC is the one that predates the NPU: it is a deliberately cut-down YOLOv2 that stays real-time on a plain Cortex-M, which is how OpenMV did person detection before Neural-ART existed, and it remains the right choice if you also target older, NPU-less cams. The v2 and v5 examples ship without a model (their paths are /rom/<model_file_name> placeholders): you provide one from OpenMV's model zoo or, for v5, train your own in Edge Impulse. On the N6, YOLOv8 is the modern default, and it is the one with a ready-to-run model in /rom, which is why we build on it. (Both ready-made /rom models, yolo_lc_192 and yolov8n_192, are single-class person detectors, so their one class is "person". In practice model.labels is read from a sidecar .txt and can arrive empty or with stray whitespace, so the counter below resolves the class index defensively rather than assuming a clean ["person"].)
The application: a people counter you can install
Detection alone is a demo. The classic step that turns it into an application is counting: a virtual yellow line across the frame, and a tally of people crossing it in each direction, which is the shop-doorway, room-occupancy, footfall challenge. It is also the right pedagogical step, because it forces the issue detection dodges: frames are independent, but counting needs identity over time. Our answer is the lightest possible multi-object tracker: match this frame's detection centroids to last frame's by proximity, and count when a track's history straddles the line. There is fifty lines of code, no libraries, but there needs to be discussion about its limits.
Save this as main.py on the device and it runs headless at power-on. With the IDE attached you get the annotated view.
# people_counter.py -- OpenMV N6
# YOLOv8-nano person detection on the Neural-ART NPU, plus a minimal
# centroid tracker and a virtual counting line. IN/OUT tallies print to
# serial and the RGB LED flashes green on an IN, red on an OUT; runs
# standalone as main.py.
#
# The whole app is four steps, repeated once per frame:
#   1. DETECT - the NPU finds people and hands back their bounding boxes.
#   2. TRACK  - match this frame's boxes to last frame's, so each person
#               keeps a stable identity over time. (Detection is
#               memoryless; counting needs memory -- that is the lesson.)
#   3. COUNT  - when a tracked person's centre crosses LINE_X, tally the
#               direction, once per person.
#   4. DRAW   - overlay the line, boxes and markers for the live IDE view.

import csi
import time
import ml
from ml.postprocessing.ultralytics import YoloV8
from machine import LED


# --- camera -----------------------------------------------------------
csi0 = csi.CSI()                        # camera handle
csi0.reset()                            # initialise to a known state
csi0.pixformat(csi.RGB565)              # 16-bit colour frames
csi0.framesize(csi.VGA)                 # 640x480: this sets the pixel
                                        # coordinate space that the boxes,
                                        # centroids and LINE_X all live in


# --- model ------------------------------------------------------------
model = ml.Model("/rom/yolov8n_192.tflite", postprocess=YoloV8(threshold=0.5))
print("labels:", model.labels)          # useful on first run; see notes below

# Resolve the "person" class index defensively. model.labels is loaded
# from a sidecar .txt, so it can be missing (None), empty, or carry stray
# whitespace/newlines -- a plain .index("person") then raises ValueError.
# Clean each label and fall back to class 0, which is "person" in both the
# single-class /rom model and standard COCO ordering.
_labels = [s.strip().lower() for s in (model.labels or [])]
PERSON = _labels.index("person") if "person" in _labels else 0

# --- counting line + tracker tuning -----------------------------------
# These three numbers are the whole "policy" of the counter. LINE_X is
# where the virtual tripwire sits; MATCH_DIST is how far a centroid may
# move between frames and still be judged the same person (too small and
# fast walkers spawn new ids, too large and neighbours get confused);
# TRACK_TTL is how many unseen frames a track tolerates before it is
# dropped, which bridges the odd missed detection.
LINE_X = 320                            # vertical line at mid-frame (VGA is 640 wide)
MATCH_DIST = 60                         # px: same person if the centroid moved less
TRACK_TTL = 5                           # frames a track survives unmatched

tracks = {}                             # id -> {x, y, ttl, counted}: the live tracks
next_id = 0                             # monotonically increasing track id
count_in = 0                            # running tallies, the whole point of the app
count_out = 0

# --- RGB LED: green for IN, red for OUT, lit for a few frames per crossing --
led_in = LED("LED_GREEN")
led_out = LED("LED_RED")
led_hold = 0                            # frames left to keep a crossing LED lit


def centroid(r):
    # Reduce a bounding box (x, y, w, h) to its centre point. We track the
    # centre rather than the whole box: it is one stable (x, y) per person,
    # which is all the proximity matcher and the line test actually need.
    x, y, w, h = r
    return (x + w // 2, y + h // 2)


clock = time.clock()
while True:
    clock.tick()
    img = csi0.snapshot()

    # predict() normally returns a list with one entry per class, but it
    # returns an empty tuple () on frames where nothing clears the
    # threshold -- so never index it blindly; guard with len() first.
    result = model.predict([img])
    detections = result[PERSON] if PERSON < len(result) else []
    cents = [centroid(r) for r, score in detections]

    # --- match detections to existing tracks (nearest, greedily) ------
    # For each existing track, claim the closest still-free detection
    # within MATCH_DIST and treat it as the same person, moved a little.
    # "Greedy" means first-track-first rather than globally optimal: cheap,
    # and fine while people move less than MATCH_DIST px per frame (easy at
    # 30 FPS). 'd' is Manhattan distance (|dx| + |dy|) -- no square root
    # needed for a simple proximity test, and cheaper on the MCU.
    unmatched = list(range(len(cents)))          # detection indices not yet claimed
    for tid, t in tracks.items():
        best, best_d = None, MATCH_DIST          # best_d starts at the gate distance
        for j in unmatched:
            d = abs(cents[j][0] - t["x"]) + abs(cents[j][1] - t["y"])
            if d < best_d:
                best, best_d = j, d              # nearest so far, within the gate
        if best is not None:
            unmatched.remove(best)               # this detection is now spoken for
            old_x = t["x"]                        # remember which side of the line it was
            t["x"], t["y"] = cents[best]          # advance the track to its new centre
            t["ttl"] = TRACK_TTL                  # seen this frame: renew its lease
            # --- the count: did this track cross the line this frame? -
            # Compare the previous X (old_x) with the new X. The half-open
            # test fires exactly once, on the frame the centre steps over
            # LINE_X; 'counted' then latches so a person is tallied once.
            if not t["counted"]:
                if old_x < LINE_X <= t["x"]:      # crossed left-to-right => IN
                    count_in += 1
                    t["counted"] = True
                    led_out.off()
                    led_in.on()
                    led_hold = 4
                elif t["x"] < LINE_X <= old_x:    # crossed right-to-left => OUT
                    count_out += 1
                    t["counted"] = True
                    led_in.off()
                    led_out.on()
                    led_hold = 4
        else:
            t["ttl"] -= 1                          # unmatched this frame: age the track

    # Births and deaths. Any detection still unmatched is a newly seen
    # person: mint a fresh id, seed it with a full lease and counted=False.
    # Then reap tracks whose ttl has reached zero -- unseen for TRACK_TTL
    # frames (walked out of shot, or a run of missed detections). The ttl
    # grace is what lets a track ride out a momentary miss instead of being
    # re-born under a new id, which would risk counting the same person twice.
    for j in unmatched:
        tracks[next_id] = {"x": cents[j][0], "y": cents[j][1],
                           "ttl": TRACK_TTL, "counted": False}
        next_id += 1
    tracks = {tid: t for tid, t in tracks.items() if t["ttl"] > 0}

    # --- annotate ------------------------------------------------------
    # OpenMV's draw_* methods take a coordinate TUPLE, not loose ints:
    # draw_line((x0,y0,x1,y1)), draw_rectangle((x,y,w,h)), draw_circle((x,y,r)).
    img.draw_line((LINE_X, 0, LINE_X, img.height()), color=(255, 255, 0), thickness=2)
    for r, score in detections:
        img.draw_rectangle(r, color=(0, 255, 0))           # r is already (x,y,w,h)
    for t in tracks.values():
        img.draw_circle((t["x"], t["y"], 4), color=(255, 0, 0), fill=True)

    # non-blocking flash: hold the crossing LED a few frames, then clear it
    if led_hold:
        led_hold -= 1
        if not led_hold:
            led_in.off()
            led_out.off()

    print("IN:", count_in, "OUT:", count_out, "tracks:", len(tracks),
          "fps:", clock.fps())
The design notes are important:
- The NPU changed what is architecturally possible here. A tracker is only as good as its frame rate: match-by-proximity works when people move a few dozen pixels between frames, which at 30 FPS is a comfortable walking pace and at 3 FPS is potentially nobody detected. On the previous OpenMV generation this application needed motion-detection heuristics; on the N6 the naïve tracker is sufficient, and the NPU is why.
- Resolving the person class index defensively.
model.labelsis not something to trust blindly: theml.Modelloads it from a sidecar.txtnext to the model, and on real firmware that list can be missing, empty, or carry stray whitespace or a\rfrom CRLF line endings, so a baremodel.labels.index("person")raisesValueError: object not in sequence. The code cleans each label (.strip().lower()) and falls back to class0, which happily is "person" in both the single-class/rommodel and standard COCO ordering. Printmodel.labelsonce and you will see exactly what your firmware reports. This is a small lesson with a wide reach: metadata that "obviously" contains what you expect is a classic source of first-run crashes. - The "no detections" case is a different type, not an empty list.
model.predict()returns a per-class list when something is found, but an empty tuple()when nothing clears the threshold, sopredict(...)[PERSON]throwsIndexError: tuple index out of rangethe moment the room is empty (which includes the first frames, before anyone appears). The guardresult[PERSON] if PERSON < len(result) else []handles both shapes. This is worth internalising: an API that signals "nothing" with a sentinel of a different type than its normal return will pass every test where something is present and fail the instant reality is empty. - The tracker's limitation: greedy nearest-centroid with a five-frame memory will swap identities when two people cross paths closely, and a
countedflag per track means each track counts once. For a doorway this is the right tool; for a wide concourse you would reach for proper assignment (Hungarian matching) and re-identification, and you would be leaving MicroPython territory. - Boundary jitter, and the hysteresis fix. A single hard line is fragile. A person pausing on
LINE_Xwill have their centroid twitch a few pixels left and right as the bounding box wobbles frame to frame, and a naïve counter would tally that jitter as a burst of crossings. Our per-trackcountedflag hides the common case (a track counts at most once), but the instant a track is lost and re-acquired at the line, that guard resets and the double-counting returns. The professional fix is hysteresis: replace the line with a band and only count once the centroid has moved a clear margin (say 10 px) past it, or require the crossing direction to persist for a couple of frames. It is a handful of lines, and it is the difference between a demo and a counter you would trust on a real-world doorway. - Standalone operation is one save away (
Tools → Save open script to OpenMV Camasmain.py), at which point the N6 is an appliance: power it from a USB brick or LiPo, and the counts stream from its UART or log to the SD card with two more lines. Wi-Fi upload to a dashboard is the natural extension, and the N6's WiFi examples help with that.
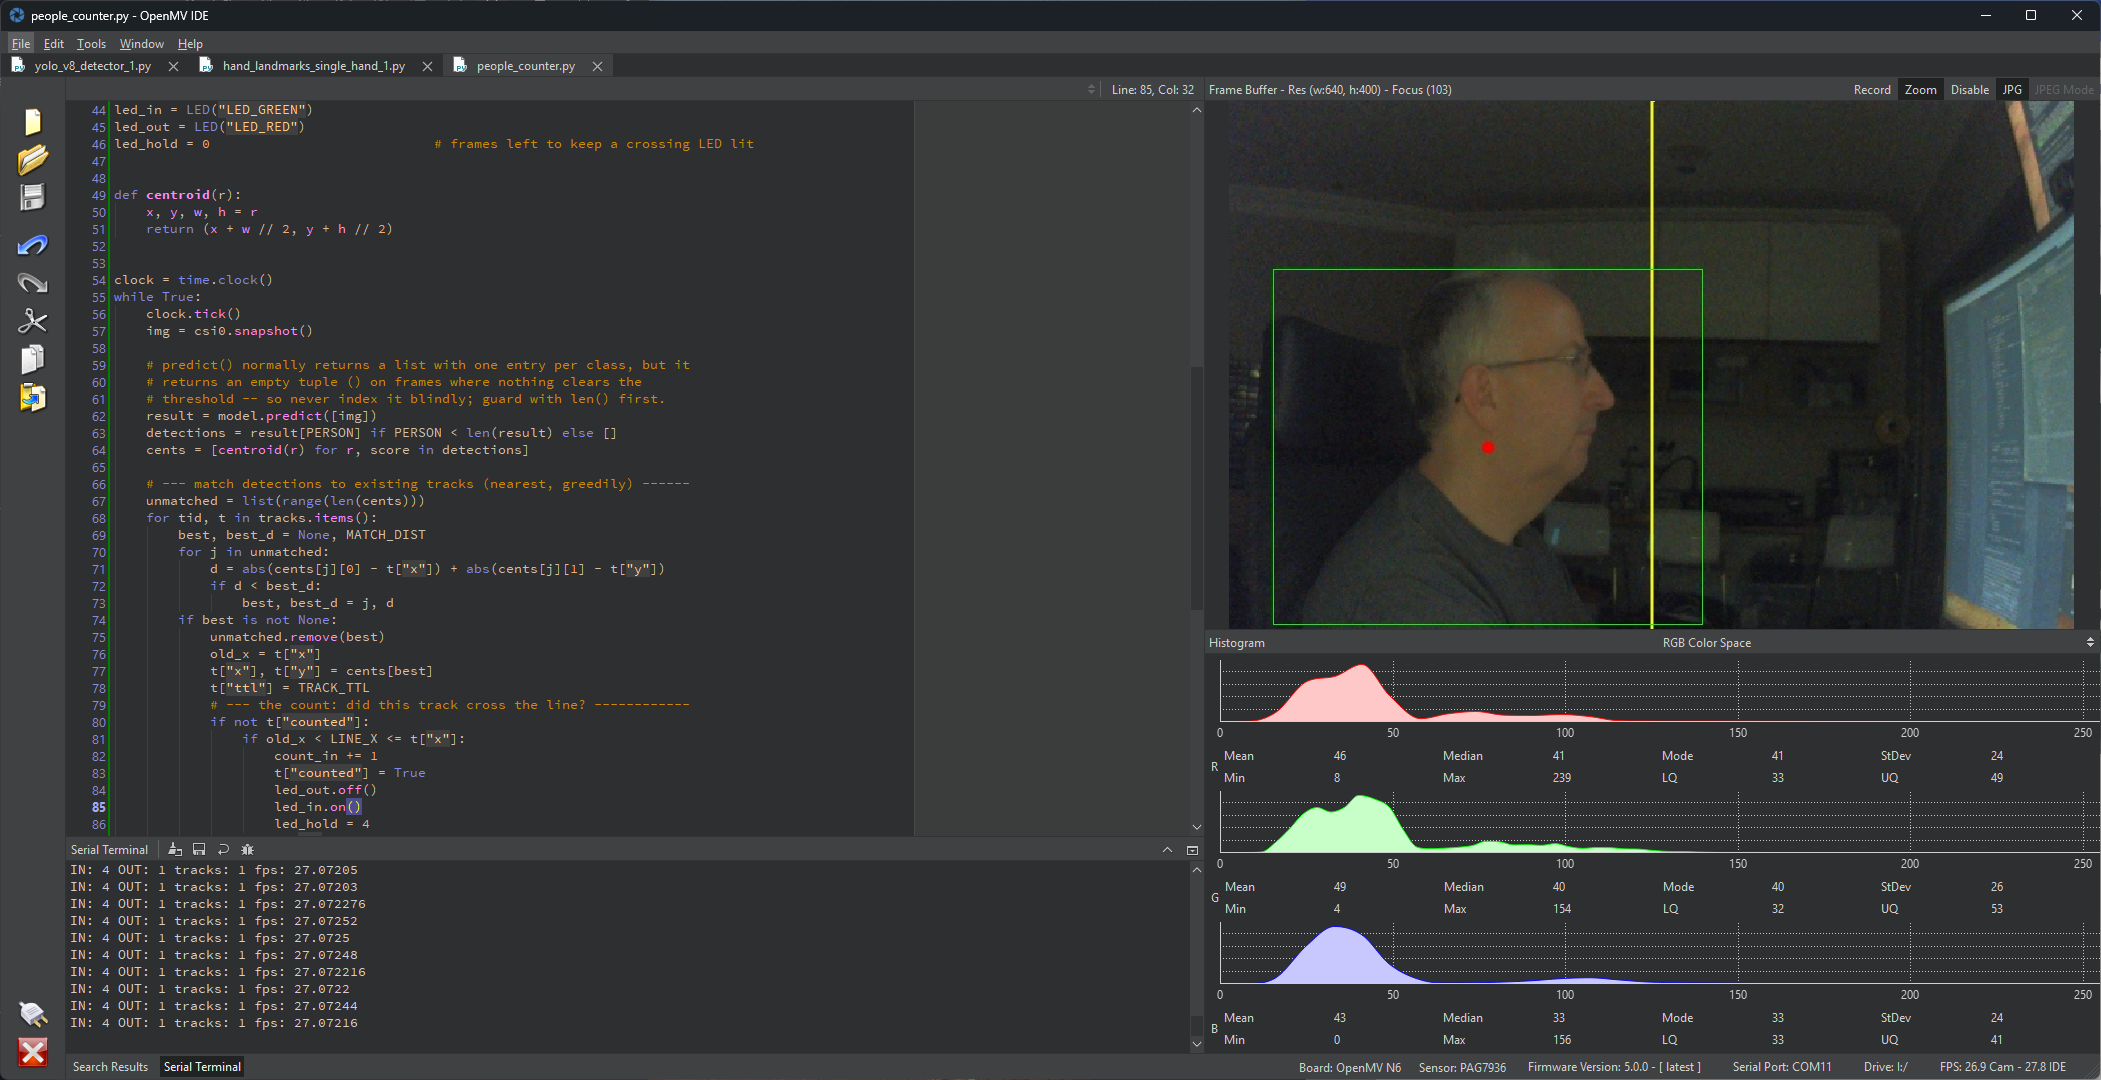
Point it across a doorway at chest height (the global shutter even works well on brisk walkers), and watch the counts climb at approx. 27 fps.
Video 3. The live view of the people_counter.py application running on the OpenMV N6. The occupancy information is avaible in the terminal output on the bottom left.
Where does the OpenMV N6 sit?
The comparison an engineer has been drawing since the spec table at the top of the page, is as follows:
The N6 is what you choose when the camera must be embedded in something: battery-powered, instantly-on, physically small, thermally silent, with the intelligence local and the output a few bytes (counts, boxes, events) rather than a video stream. It gives up the UNO Q's and Pi's infinite software horizon and answers with deployability. In that sense OpenMV's decade-old motivation is intact in the NPU era – the camera is not a peripheral of a computer; the camera is the computer.
Conclusion
- The N6's headline is architectural: a flashless STM32N6 ringed by 64 MB of DDR and 32 MB of octal flash, with a 600-GOPS Neural-ART NPU doing the tensor work and an 800 MHz M55 running your Python. Microcontroller deployment habits, single-board-computer memory, dedicated-silicon inference.
- The developer experience stays simple: an IDE with a live frame buffer, a camera that is a Python object, and a model that is a file plus a one-line load, with post-processing decoders (
ml.postprocessing) turning tensors into boxes so your loop reads like application logic. - The global-shutter, removable camera module and the industrial I/O list (CAN FD, PoE Ethernet, IMU, LiPo) mark this as a board to install, not just to demo.
- The people counter is the pattern to reuse: NPU detection per frame, the lightest tracker that survives your frame rate, and application logic in plain Python; the NPU's value is that naïve algorithms become sufficient.
In Part 2, the same OpenMV ideas get compressed to their logical extreme: the OpenMV AE3, a thumbnail-sized board around Alif's Ensemble E3 with two Cortex-M55s and two Ethos-U55 NPUs, drawing so little power that vision applications start being measured in months of battery rather than days. The question it poses is a sharper version of this post's:
How small can "the camera is the computer" get before something has to give?...

