Introduction
In the video below I look at how you can get started with video capture and image processing on the Beaglebone. It is an introductory video that should give people who are new to this topic a starting point to work from. I look at three different distinct challenges:
- How do you capture video from a USB webcam under Linux – I do this using the capture.c source code that uses Video4Linux to capture a raw stream from the USB camera. This raw stream is then wrapped with a H264 header using FFMPEG.
- How do you capture image frames from a USB webcam under Linux – I do this using the grabber.c source code that again uses Video4Linux to capture raw video frames in the uncompressed PPM format.
- How do you use OpenCV to capture and image process frames so that you can build computer vision applications under Linux on the Beaglebone – I do this using the boneCV.cpp program as described below. This code uses the OpenCV library which is available on the Angstrom distribution of the Beaglebone. Finally, I write a small program boneCVtiming.cpp to test the performance of the Beaglebone black for capturing and processing image data.
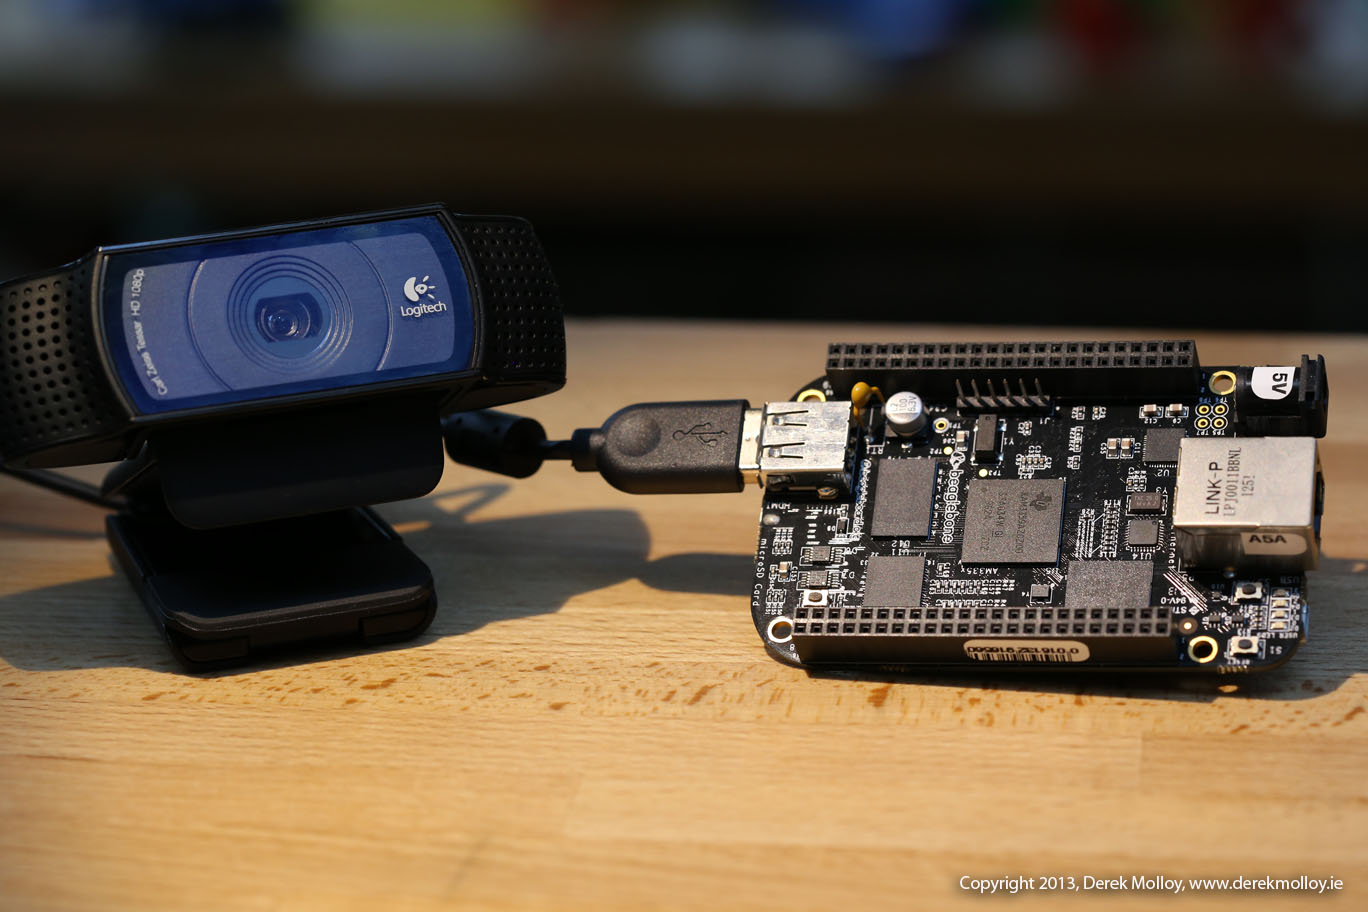
In this video I use a Logitech C920 and the Beaglebone Black. I would highly recommend both of these devices because of the processing power of the Beaglebone black and the high resolution capability of the C920. However, you should be able to adapt the code to any specific camera.
The Video
[youtube id=”8QouvYMfmQo” width=”600″ height=”350″]
If you use this code or the content of the associated video in your research, please cite:
Molloy, D. [DerekMolloyDCU]. (2013, May, 25). Beaglebone: Video Capture and Image Processing on Embedded Linux using OpenCV [Video file]. Retrieved from http://www.youtube.com/watch?v=8QouvYMfmQo
Example OpenCV Images
Here are the two images that were captured during the course of the video:
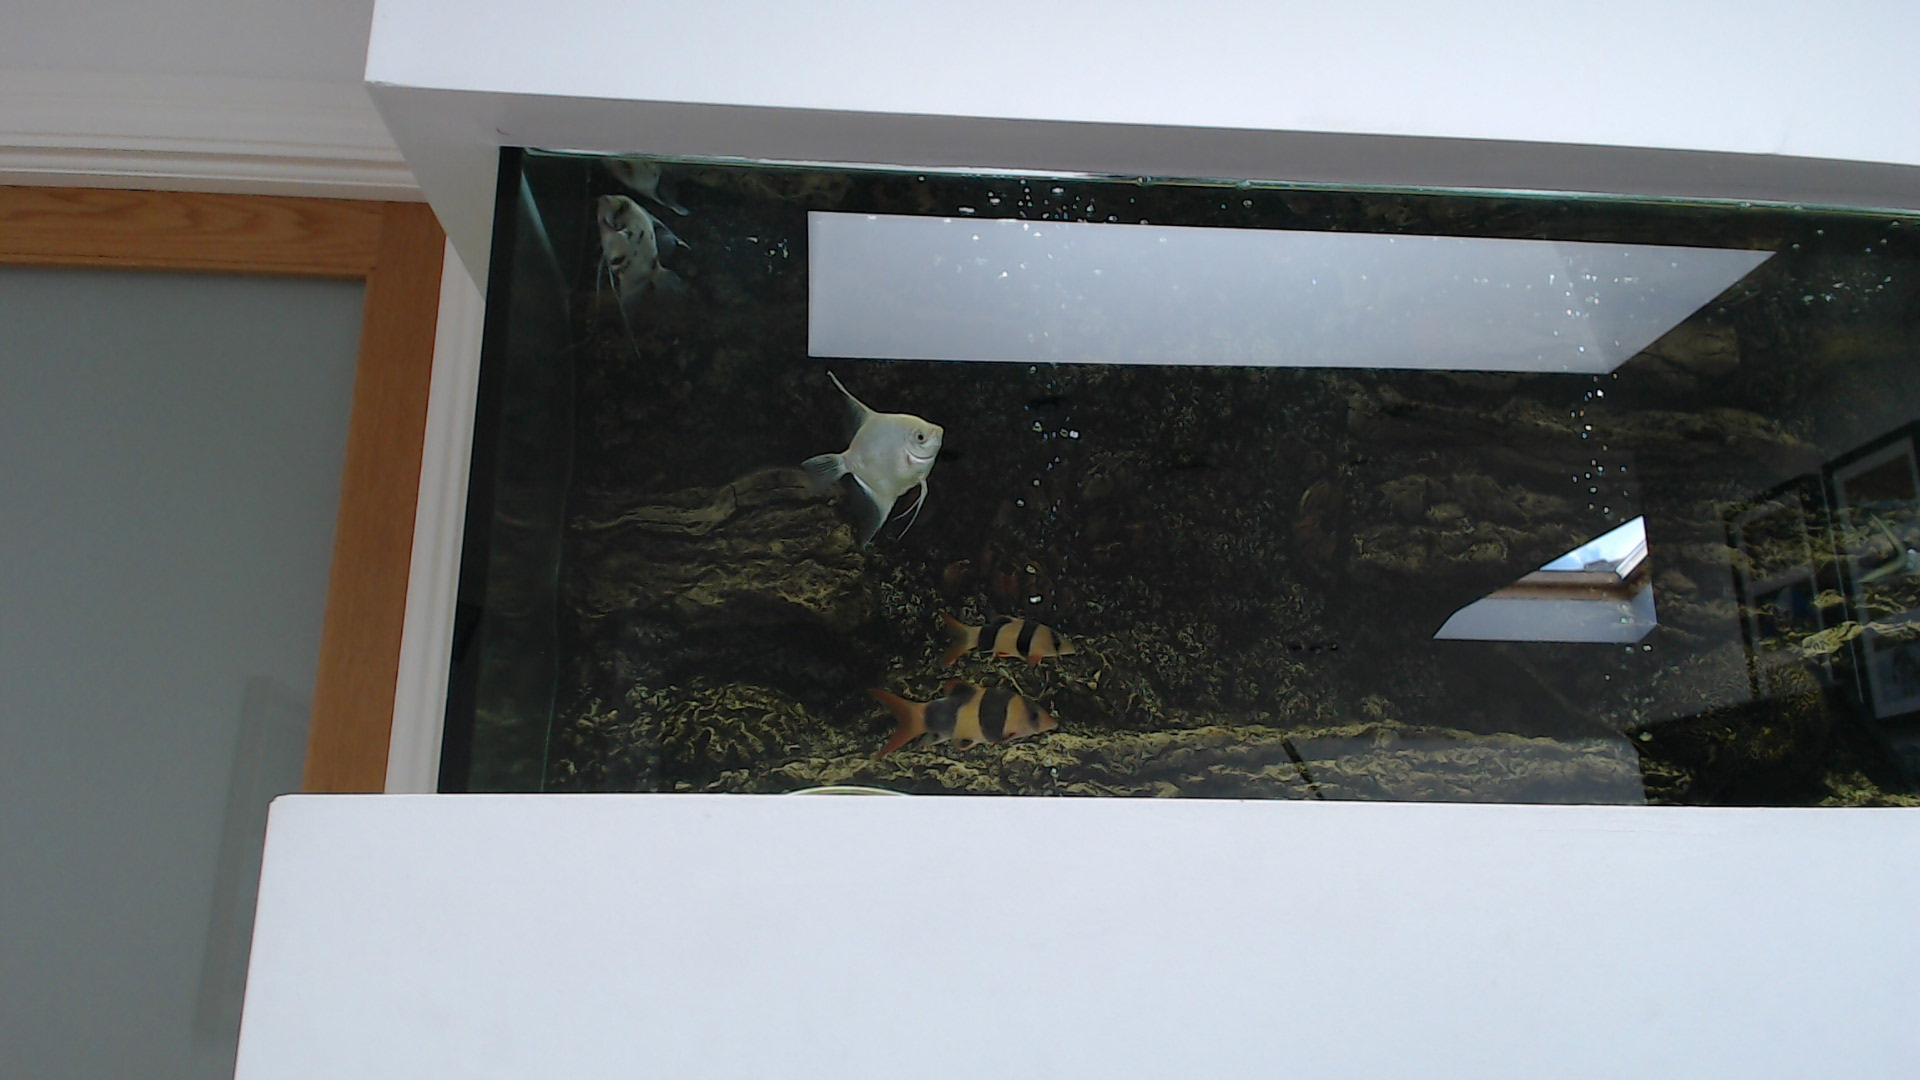
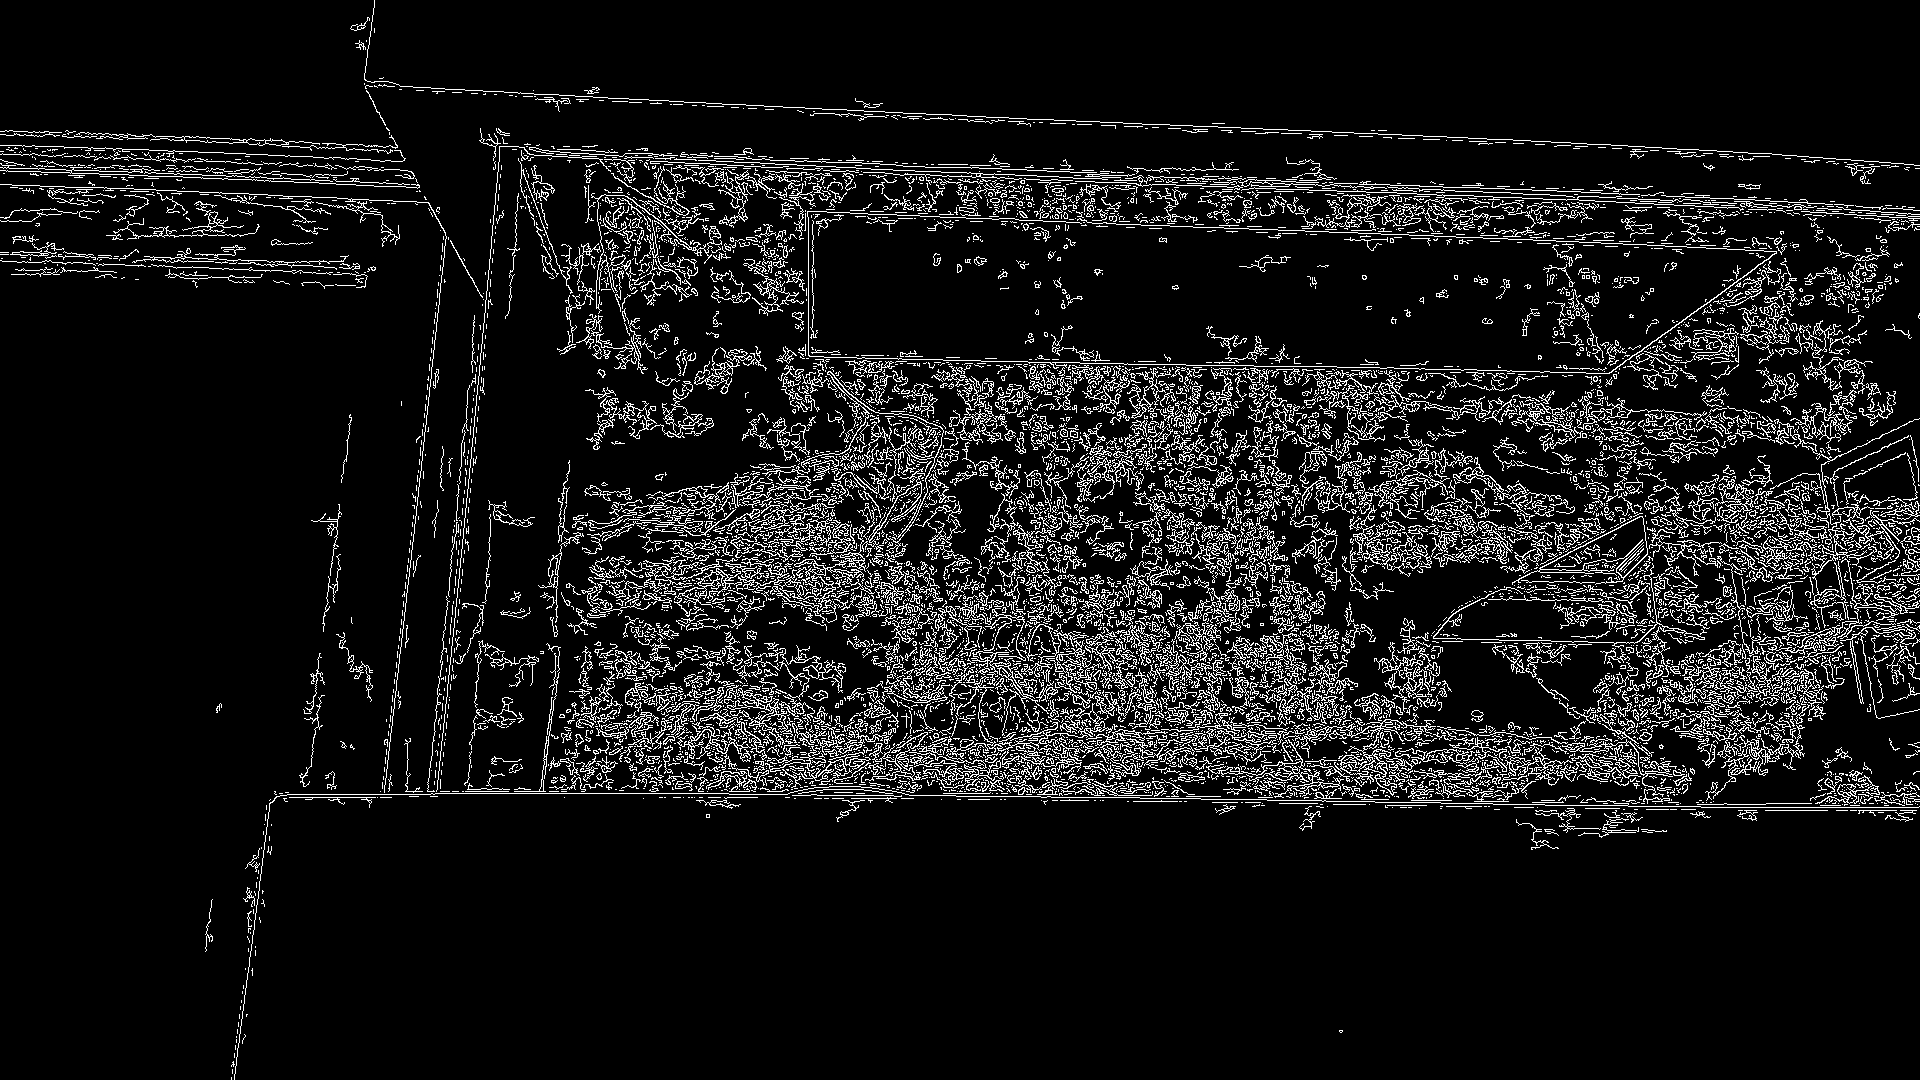
The image on the left is the original image captured on the Beaglebone black using OpenCV, which has been encoded in PNG format. The image on the right is the edge detected version that was processed on the Beaglebone black using the OpenCV Sobel edge detector. Please press on these images for higher resolution versions.
Source Code
The code for this video is available at: github.com/derekmolloy/boneCV/ but the important code is presented below:
The OpenCV Code is as follows:
|
1 2 3 4 5 6 7 8 9 10 11 12 13 14 15 16 17 18 19 20 21 22 23 24 25 26 27 28 29 30 31 32 33 34 35 36 |
/* boneCV.cpp * * Copyright Derek Molloy, School of Electronic Engineering, Dublin City University * www.derekmolloy.ie * * Redistribution and use in source and binary forms, with or without modification, are permitted * provided that source code redistributions retain this notice. * * This software is provided AS IS and it comes with no warranties of any type. */ #include<iostream> #include<opencv2/opencv.hpp> using namespace std; using namespace cv; int main() { VideoCapture capture(0); capture.set(CV_CAP_PROP_FRAME_WIDTH,1920); capture.set(CV_CAP_PROP_FRAME_HEIGHT,1080); if(!capture.isOpened()){ cout << "Failed to connect to the camera." << endl; } Mat frame, edges; capture >> frame; if(frame.empty()){ cout << "Failed to capture an image" << endl; return -1; } cvtColor(frame, edges, CV_BGR2GRAY); Canny(edges, edges, 0, 30, 3); imwrite("edges.png", edges); imwrite("capture.png", frame); return 0; } |
This is the main program discussed in the video. There is also a program to test the performance of the OpenCV Application:
|
1 2 3 4 5 6 7 8 9 10 11 12 13 14 15 16 17 18 19 20 21 22 23 24 25 26 27 28 29 30 31 32 33 34 35 36 37 38 39 40 41 42 43 44 45 46 47 48 49 50 |
/* boneCVtiming.cpp * * Copyright Derek Molloy, School of Electronic Engineering, Dublin City University * www.derekmolloy.ie * * Redistribution and use in source and binary forms, with or without modification, are permitted * provided that source code redistributions retain this notice. * * This software is provided AS IS and it comes with no warranties of any type. */ #include<iostream> #include<opencv2/opencv.hpp> #include<time.h> using namespace std; using namespace cv; int main() { VideoCapture capture(0); capture.set(CV_CAP_PROP_FRAME_WIDTH,640); capture.set(CV_CAP_PROP_FRAME_HEIGHT,480); if(!capture.isOpened()){ cout << "Failed to connect to the camera." << endl; } Mat frame, edges; struct timespec start, end; clock_gettime( CLOCK_REALTIME, &start ); int frames=10; for(int i=0; i<frames; i++){ capture >> frame; if(frame.empty()){ cout << "Failed to capture an image" << endl; return -1; } cvtColor(frame, edges, CV_BGR2GRAY); Canny(edges, edges, 0, 30, 3); } clock_gettime( CLOCK_REALTIME, &end ); double difference = (end.tv_sec - start.tv_sec) + (double)(end.tv_nsec - start.tv_nsec)/1000000000.0d; cout << "It took " << difference << " seconds to process " << frames << " frames" << endl; cout << "Capturing and processing " << frames/difference << " frames per second " << endl; imwrite("edges.png", edges); imwrite("capture.png", frame); return 0; } |
The build script for these files is given in build (note the -lrt for the timing example):
|
1 2 3 4 5 6 7 8 9 10 11 12 13 14 15 16 17 |
#!/bin/bash echo "Video for Beaglebone Video Applications - derekmolloy.ie" echo "Building the OpenCV example for the Beaglebone" g++ -O2 `pkg-config --cflags --libs opencv` boneCV.cpp -o boneCV echo "Building the OpenCV timing example for the Beaglebone" g++ -O2 `pkg-config --cflags --libs opencv` -lrt boneCVtiming.cpp -o boneCVtiming echo "Building the Video4Linux frame capture program" gcc -O2 -Wall `pkg-config --cflags --libs libv4l2` grabber.c -o grabber echo "Building the Video4Linux capture example program" gcc -O2 -Wall `pkg-config --cflags --libs libv4l2` capture.c -o capture echo "Finished" |
-O2 means optimize for code size and execution time -O3 would optimize even more for execution time (O for optimize)
-Wall enables all possible compiler warning messages – should always be used to give the best possible code.
Make sure that you set the build script to be executable.
Performance and GPU Support
At the end of the video I discussed the performance of OpenCV on the Beaglebone. This would be greatly improved if there was support for the GPU that is present on the Beaglebone; however, a quick check using the code below indicates that GPU support is not available, nor do I think it would be easy to achieve. If you try to perform an operation such as:
|
1 2 3 4 5 6 7 8 |
try{ cv::gpu::GpuMat input, output; input.upload(edges); cv::gpu::threshold(input, output, 128.0, 255.0, CV_THRESH_BINARY); } catch(const cv::Exception& e){ cout << "GPU operation failed" << endl; } |
You will get the following output error:
|
1 2 |
OpenCV Error: No GPU support (The library is compiled without CUDA support) in mallocPitch, file /build/v2012.12/build/tmp-angstrom_v2012_12-eglibc/work/armv7a-vfp-neon-angstrom-linux-gnueabi/opencv-2.4.2-r3/opencv/modules/core/src/gpumat.cpp, line 749 GPU operation failed |