Introduction
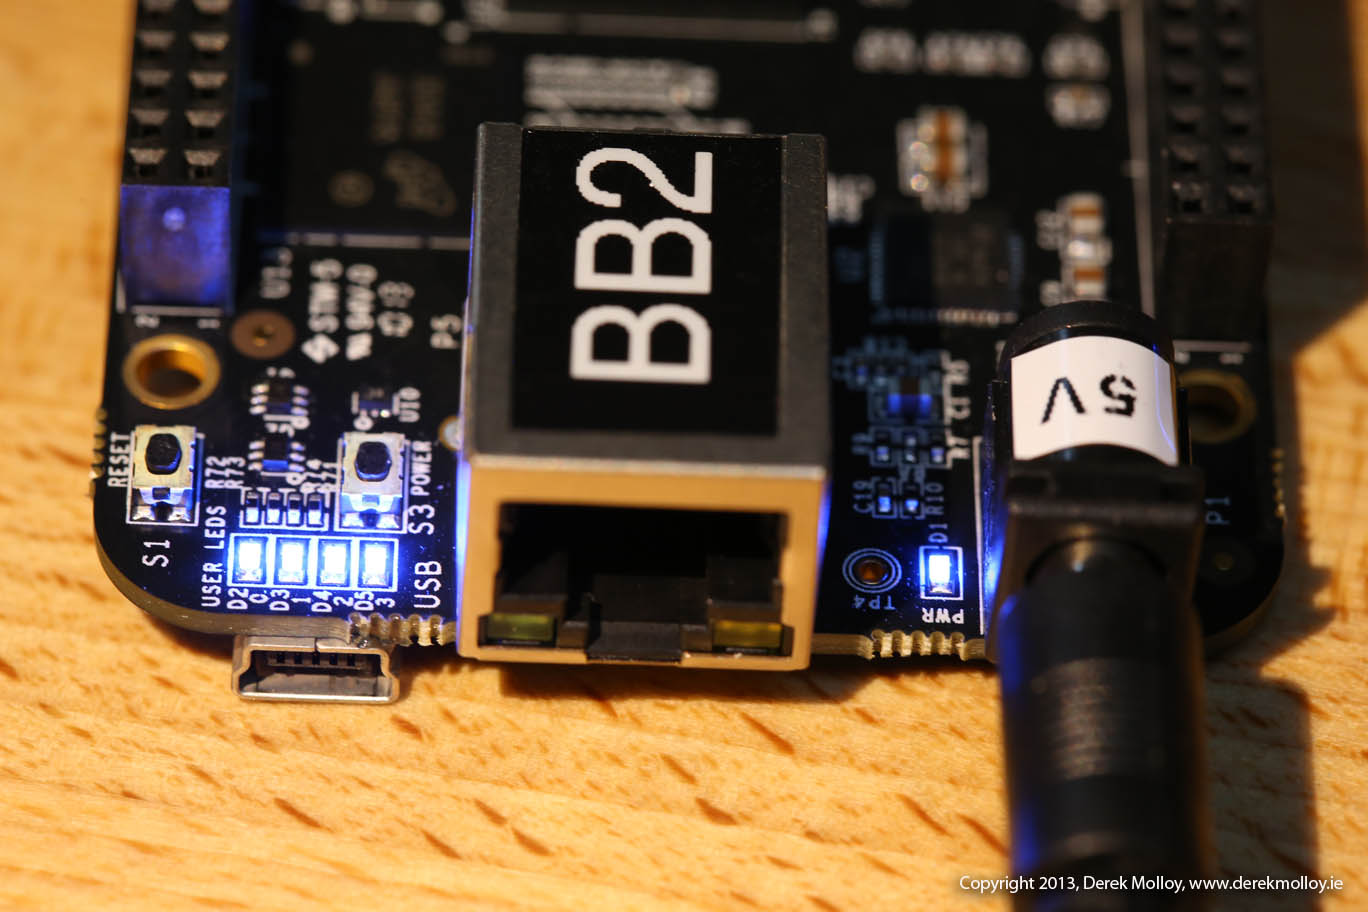
One of the first things you would like to do when you connect to the Beaglebone Black is see that you are having an impact on the hardware. In this short post I am going to look at how you can change the behaviour of the Beaglebone on-board LEDs – the four (blue on the BBB) LEDs in the corner near the reset button.
Now, the LEDs are there for a reason, and that reason is to give information about the Beaglebone state (from beaglebone.org):
USR0 is configured at boot to blink in a heartbeat pattern
USR1 is configured at boot to light during microSD card accesses
USR2 is configured at boot to light during CPU activity
USR3 is configured at boot to light during eMMC accesses
We can change the behaviour of these LEDs, but obviously we will temporarily lose this valuable information. The heartbeat tells you that the BBB is alive, which is always useful to know. The others are fairly self explanatory (the eMMC is the solid state memory that you are booting from).
First – At the command line
Sysfs is a virtual file system that is available under Linux that gives information and access to devices and drivers that would otherwise only be accessible in Kernel Space. It gives us a virtual file system in Linux User Space, which is convenient to use; however, it is not highly efficient.
At the command line, we can go to to directory /sys/class/leds:
|
1 2 3 4 5 6 7 8 9 |
root@beaglebone:/sys/class/leds# ls -al total 0 drwxr-xr-x 2 root root 0 Jan 1 00:00 . drwxr-xr-x 48 root root 0 Jan 1 00:00 .. lrwxrwxrwx 1 root root 0 Jan 1 00:00 beaglebone:green:usr0 -> ../../devices/ocp.2/gpio-leds.7/leds/beaglebone:green:usr0 lrwxrwxrwx 1 root root 0 Jan 1 00:00 beaglebone:green:usr1 -> ../../devices/ocp.2/gpio-leds.7/leds/beaglebone:green:usr1 lrwxrwxrwx 1 root root 0 Jan 1 00:00 beaglebone:green:usr2 -> ../../devices/ocp.2/gpio-leds.7/leds/beaglebone:green:usr2 lrwxrwxrwx 1 root root 0 Jan 1 00:00 beaglebone:green:usr3 -> ../../devices/ocp.2/gpio-leds.7/leds/beaglebone:green:usr3 root@beaglebone:/sys/class/leds# |
You can see the four (green!) LEDs, usr0, usr1, usr2 and usr3 and their mappings.
We can go into the directory of the first LED:
|
1 2 3 4 5 6 7 8 9 10 11 12 13 |
root@beaglebone:/sys/class/leds# cd beaglebone:green:usr0 root@beaglebone:/sys/class/leds/beaglebone:green:usr0# ls -al total 0 drwxr-xr-x 3 root root 0 Jan 1 00:00 . drwxr-xr-x 6 root root 0 Jan 1 00:00 .. -rw-r--r-- 1 root root 4096 Jan 1 02:08 brightness lrwxrwxrwx 1 root root 0 Jan 1 02:08 device -> ../../../gpio-leds.7 -r--r--r-- 1 root root 4096 Jan 1 02:08 max_brightness drwxr-xr-x 2 root root 0 Jan 1 02:08 power lrwxrwxrwx 1 root root 0 Jan 1 02:08 subsystem -> ../../../../../class/leds -rw-r--r-- 1 root root 4096 Jan 1 02:08 trigger -rw-r--r-- 1 root root 4096 Jan 1 00:00 uevent root@beaglebone:/sys/class/leds/beaglebone:green:usr0# |
Here you see various different sub-directories that give us further information and access to settings. We can find out the current status of the LED by:
|
1 2 |
root@beaglebone:/sys/class/leds/beaglebone:green:usr0# more trigger none nand-disk mmc0 mmc1 timer oneshot [heartbeat] backlight gpio cpu0 default-on transient |
You can see that the trigger is set up as a “heartbeat”
We can turn this off by:
|
1 |
root@beaglebone:/sys/class/leds/beaglebone:green:usr0# echo none > trigger |
And you will see (hopefully) that the LED stops flashing. So, let’s try a few different options:
Turning on the LED
Now that the trigger is off, we can turn on the LED using the brightness setting:
|
1 |
root@beaglebone:/sys/class/leds/beaglebone:green:usr0# echo 1 > brightness |
The first LED should go on.
Turning off the LED
We can turn off the LED using the brightness setting:
|
1 |
root@beaglebone:/sys/class/leds/beaglebone:green:usr0# echo 0 > brightness |
The first LED should go off.
Making the LED Flash
We can use the timer trigger to make the LED flash, so do the following:
|
1 2 3 |
root@beaglebone:/sys/class/leds/beaglebone:green:usr0# echo timer > trigger root@beaglebone:/sys/class/leds/beaglebone:green:usr0# echo 50 > delay_on root@beaglebone:/sys/class/leds/beaglebone:green:usr0# echo 50 > delay_off |
You have to set up the timer before writing to delay_on and delay_off. So the first line sets up a timer and on the second and third lines we set up the time for the first LED to be on and off (in milliseconds). So this will cause the first LED to flash 10 times per second (i.e. time on + time off = 100ms, so 10 flashes per second).
Setting it Back to a Heartbeat
We can set it back to the way it was before we started:
|
1 |
root@beaglebone:/sys/class/leds/beaglebone:green:usr0# echo heartbeat > trigger |
It should go back to the heartbeat trigger.
C++ Implementation
Now that we have this working at the command line it would be useful if we could write programs that interface to the LEDs in a similar fashion. My C++ implementation code is below. It uses the C++ fstream and iostream libraries to read and write data to the input/outputs using sysfs.
|
1 2 3 4 5 6 7 8 9 10 11 12 13 14 15 16 17 18 19 20 21 22 23 24 25 26 27 28 29 30 31 32 33 34 35 36 37 38 39 40 41 42 43 44 45 46 47 48 49 50 51 52 53 54 55 56 57 58 59 60 61 62 63 64 65 66 67 68 69 70 71 72 73 74 |
/** Simple On-board LED flashing program - written by Derek Molloy for the ee402 module This program uses USR LED 0 and can be executed in three ways: makeLED on makeLED off makeLED flash (flash at 100ms intervals - on 50ms/off 50ms) makeLED status (get the trigger status) */ #include<iostream> #include<fstream> #include<string> using namespace std; #define LED0_PATH "/sys/class/leds/beaglebone:green:usr0" void removeTrigger(){ // remove the trigger from the LED std::fstream fs; fs.open( LED0_PATH "/trigger", std::fstream::out); fs << "none"; fs.close(); } int main(int argc, char* argv[]){ if(argc!=2){ cout << "Usage is makeLED and one of: on, off, flash or status" << endl; cout << "e.g. makeLED flash" << endl; } string cmd(argv[1]); std::fstream fs; cout << "Starting the LED flash program" << endl; cout << "The LED Path is: " << LED0_PATH << endl; // select whether it is on, off or flash if(cmd=="on"){ removeTrigger(); fs.open (LED0_PATH "/brightness", std::fstream::out); fs << "1"; fs.close(); } else if (cmd=="off"){ removeTrigger(); fs.open (LED0_PATH "/brightness", std::fstream::out); fs << "0"; fs.close(); } else if (cmd=="flash"){ fs.open (LED0_PATH "/trigger", std::fstream::out); fs << "timer"; fs.close(); fs.open (LED0_PATH "/delay_on", std::fstream::out); fs << "50"; fs.close(); fs.open (LED0_PATH "/delay_off", std::fstream::out); fs << "50"; fs.close(); } else if (cmd=="status"){ // display the current trigger details fs.open( LED0_PATH "/trigger", std::fstream::in); string line; while(getline(fs,line)) cout << line; fs.close(); } else{ cout << "Invalid command" << endl; } cout << "Finished the LED flash program" << endl; return 0; } |
Effectively, this code carries out the exact same steps as what I did in the first part of this post; however, now it is wrapped up as a command that we can add to our $PATH in order that it can be called from any location. The way you build the code on the Beaglebone Black is as follows:
|
1 2 3 4 |
#!/bin/bash echo "EE402 - Building the Test LED program on the Beaglebone Black" g++ makeLED.cpp -o makeLED echo "Finished" |
I have made all of the code available via github, so you can download this by the following steps:
|
1 2 3 4 5 6 7 8 9 10 11 12 13 14 15 16 17 18 19 20 |
root@beaglebone:~/temp# git clone git://github.com/derekmolloy/ee402 Cloning into ee402... remote: Counting objects: 52, done. remote: Compressing objects: 100% (43/43), done. remote: Total 52 (delta 19), reused 35 (delta 8) Receiving objects: 100% (52/52), 33.71 KiB, done. Resolving deltas: 100% (19/19), done. root@beaglebone:~/temp# ls ee402 root@beaglebone:~/temp# cd ee402/ root@beaglebone:~/temp/ee402# ls LEDcpp LICENSE README.md scripts testcpp testjava root@beaglebone:~/temp/ee402# cd LEDcpp/ root@beaglebone:~/temp/ee402/LEDcpp# ls -al total 32 drwxr-xr-x 2 root root 4096 Nov 20 23:24 . drwxr-xr-x 7 root root 4096 Nov 20 23:24 .. -rwxr-xr-x 1 root root 124 Nov 20 23:24 build -rwxr-xr-x 1 root root 13955 Nov 20 23:24 makeLED -rw-r--r-- 1 root root 1834 Nov 20 23:24 makeLED.cpp |
Now, build the code and execute it:
|
1 2 3 4 5 6 7 8 9 10 11 12 |
root@beaglebone:~/temp/ee402/LEDcpp# ./build EE402 - Building the Test LED program on the Beaglebone Black Finished root@beaglebone:~/temp/ee402/LEDcpp# ./makeLED status Starting the LED flash program The LED Path is: /sys/class/leds/beaglebone:green:usr0 none nand-disk mmc0 mmc1 timer oneshot [heartbeat] backlight gpio cpu0 default-on transient Finished the LED flash program root@beaglebone:~/temp/ee402/LEDcpp# ./makeLED flash Starting the LED flash program The LED Path is: /sys/class/leds/beaglebone:green:usr0 Finished the LED flash program root@beaglebone:~/temp/ee402/LEDcpp# |
The way we can interact with GPIOs is not much different than this; however, we have complexities to deal with to do with the Device Tree, and we have to use Device Tree Overlays. See my post: GPIOs on the Beaglebone Black using the Device Tree Overlays on this topic.


Nice blog post, thanks a lot!
There’s a tag in the git command that shouldn’t be there.
Thanks Frank – Fixed!
Hi Derek, your website and the videos are extremely helpful.
I was wondering if you had plans on adding videos on how to create a cluster computer with the Beaglebone black.
I am very new to this concept, but I am very interested in learning more about parallel computing.
Thanks, really appreciate your help.
Hi Derek and others,
You can set a default trigger to a user LED using the file /etc/default/leds
The original content for my file (using the BBB-eMMC-flasher-2013.09.04 image) is:
#file format: name trigger
beaglebone::usr0 heartbeat
So to turn of the trigger for the heartbeat and SD card access you could do it this way:
#file format: name trigger
beaglebone:green:usr0 none
beaglebone:green:usr1 none
Notice the word “green” I put in there. Maybe this default file is a leftover from the BeagleBoard, but with the BeagleBone Black you have to add the “green” to the line for any effect since the user LED folder contains the word “green”.
After a reboot, the heartbeat and SD card access LEDs are turned off, free to use for other purposes.
Hi Derek,
Very nice blog indeed. Thanks for doing that!
I’m just wondering if there is a faster way to program/set GPIO’s. Let’s say I have a special LCD and I have to fill the screen (320×240 res) under 30 ms.
If I must ask a more generic question, how fast can I change/set a single GPIO state?
Thanks
Acraft, I would think the C++ program would execute pretty fast. Remember the CPU can do 2000 MIPS, that’s 2 billion instructions per second, and I guess a single line of C++ code is a few instructions each, so you get at least a couple hundred million lines of C++ executed every second.
If my 100MHz scope had arrived yet, I would be happy to test this for you, but it should arrive in 2 weeks, and I can post results when I get it if you’d like.
Hi Derek,
When I try to change the status of USR0 via the command line, I just get ‘No such file or directory.’ I am logged in as root on Angstrom. Any ideas?
Cheers,
Anthony Webber
Hey Derek,
am really enjoying your book.
however, have bumped into a issue around page 187.
The makeLEDmulti file doesn’t really work.
Even after re-reading the source code. Can’t find the error.
But then again, still learning the C++ language.
Tried re-compiling. Also didn’t work.
both ./flashled and ./chp05/makeLEDmulti/flashled failed.
not sure what happened. All the other stuff seems to work.
Hi Lorcan, thanks for your support. For that example to work you MUST execute the build script (./build) in order to create the symbolic links in that directory (flashled, ledstatus, offled, and onled). You will see the links appear by using ls and then you can execute the script using sudo ./flashled (or any of the other commands). Hope that helps, Derek.
Thanks, apparently have overlooked that file.
Hey, Im very new to linux. I had problems executing the cpp programs you had given. I was not able to see the led behaviour on board. After I changed the command to sudo sh -c ‘./led on’ things started working.. Should I have to always use the prefix sudo sh -c ? Thanks in advance.
Best Regards,
Bhimsen
Hello Derek.
Did you ever get around to write a book on how to use the GPIO, PWM and Analog I/O on the Beaglebone black in C++?
I have some projects in mind and I am learning C++, but I find a bit hard to interface my knowledge in C++ with the Beaglebone (also because the BlackLib available is not so easy to understand for a beginner as I am).
If so, what’s the title of the book? I would like to purchase a copy.
Would you mind to reply also to my email? I wouldn’t like to lose the chance to get this book.
Thanks
Andrew
Hey Derek et all,
Great tutorials and book Derek. I have a question or two about interfacing and controlling the hardware on the BBB Rev C under a user account instead of root. First, is it actually possible to control the USR LEDS or any other HW with an account other root? Doesn’t seem to work with a user account. When using the debugger in eclipse it wont hit breakpoints or actuate the hardware io either. Any suggestions?
Thanks,
Steve
Hello Derek
This c++ return an error at line 66. It looks like getline has invalid arguments.
In Eclipse CDT the error follows:
Invalid arguments ‘
Candidates are:
int getline(char * *, unsigned int *, _IO_FILE *)
std::basic_istream & getline(std::basic_istream &, ? &, #0)
std::basic_istream & getline(std::basic_istream &, ? &)
Why is this happening?
Hi, I have a question. I want to programmes gpio, i2c, … in c/c++. What’s the difference between you solution here and libs like blacklib? You don’t use it Lib like blacklib in your tutorial. You are only working with the standard environment libs, is that right?
Hello Derek,
thanks a lot for Your useful hints and tips. I’m Newcomer in using Linux and am
exploring BBB – following Your great Videos.
When using eclipse in combination with GDB Server i get an error:
file or Folder not found (Server does not listen)
so stepping through source is not possible.
Running the Programm works fine
I’m using VM-Ware, Ubuntu 14.04
Eclipse Platform
Version: 3.8.1
Build id: debbuild
Do You have any ideas how to run the gdbserver on BBB in this case?